Friday, August 30, 2013

Lime Green Fundoshi....one more time...


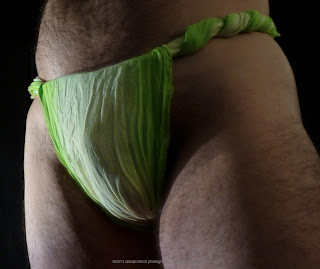
One last design of the lime green crinkle gauze. This one was very simple, but might be a favorite. I simply discharged the dye from the center of the fabric. 


fundoshi


I got a little moody with the lighting, so you will see some motion blur. For the most part, I think I like of some of the motion looks in the photo. Previously, I have been very selective and have not added pictures with blur, but a little bit makes some of them interesting, so now you are seeing them!


As a recap, here are all 5 lime green fundoshi. At the end of the next page, I added some shots from other designs that didn’t make it into a previous blog....just because...

fundoshi as art


Fundoshi....final lime green design. I'll use this one again!

Fabric....crinkle gauze.

Photography....No flash, just some simple lighting. This is a bit hard since any movement created a blur effect. Sometimes I liked it, sometimes I did not. 

And now...the rest of the photos....

Sunday, August 25, 2013

Cheesecloth Fundoshi - 2 More Designs


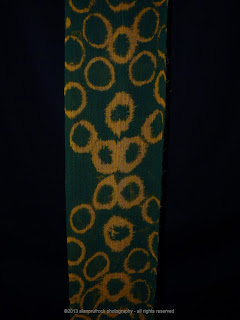
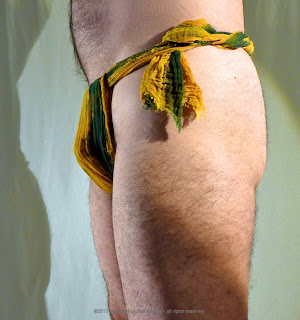
Back to the rather see-through hunter green cheesecloth. Let us call this pair circles and stripes.....

fundoshifundoshi

For the stripes, I used a brush to get the discharge solution along the edges and in the center. This material is so thin, I actually accomplished this easily by folding the material in half, three different times. This doesn’t work with all materials, and trial and error is the way I am learning. The crinkle guaze I have been working with doesn’t react as well. I can only fold that in half once for the discharge solution to flow to both sides of the material. 
fundoshi

For the circles, I used a cookie cutter. I used a larger one on one of the lime green designs, but for this, I chose a smaller circle and was rather haphazard in the placement. You will most likely see this approach again.
fundoshi

I used some spot lighting to create a circle on the backdrop, and used it to get some shadow effects. I’m still trying to conceive of a shadow only shoot. Since the fundoshi needs to be the focus, this may be hard. If I figure out the balance, you will see it in the coming weeks. 
fundoshi


Fundoshi....hunter green and quite soft

Fabric....cheesecloth

Photography....Once again, I am back to the white backdrop and it’s inherent flaws. This shoot was done at the same time as the last shoot, so there wasn’t much I could manipulate after seeing the photos. 

And now...the rest of the photos....

Tuesday, August 20, 2013

Fundoshi of Lavender - 2 More Designs


Here we are again with lavender crinkle gauze. It really is very comfortable to wear. 

For one, I chose a Jackson Pollack like splatter of the bleach. I'm not too sure on how successful it is....

For the other, I went with a brushed on approach, removing color from the edges and a little in the center....

I'm still using the black backdrop and for this shoot. I used more directional lighting, creating a bit more shadow than in the last shoot. 
fundoshi

I'm still working on how to capture a moody lighting without a blur from slight movement. I guess it could be solved by having a flash unit separate from my camera, but that would mean a new camera and flash unit as my current camera doesn't have the ability to connect to a remote flash unit. Maybe Santa will be good to me this year!
fundoshi

Fundoshi....lavender and comfortable

Fabric....crinkle gauze

Photography....I do like the play of light and shadow on some of these. I'll have to experiment to see how far I can push this and stay in focus.

And now...the rest of the photos....

Thursday, August 15, 2013

Lime Green Fundoshi - Two More Designs


Back to the lime green crinkle gauze. You may notice from the close ups of these designs that the ‘crinkle’ has gone out of the fabric. I haven’t figured out what causes this, but I’m keeping an eye on it. Some of the modified fundoshi exhibit this, while others do not. Since I use the same chemicals, I can’t really say it is a result of the process.  


I have also noticed that these treated fundoshi are softer than the non-treated ones. Of course, this may be due to my wearing them more frequently than the plain ones, so they get washed more often.

I tied one of these rather high and wide for this shoot. I wanted to show off the design that is mostly on the edges. 


Fundoshi....
Lime Green - enhanced versions. 

Fundoshi as art

                                                 
Fabric....
Crinkle gauze that seems to have lost the crinkle.  

Photography....
I like how the green almost glows against the black backdrop. I also played around with the lighting positions and used my lamps as spot lights. I kept snapping, adjusting, snapping, adjusting....you never know what will work until you try!

Fundoshi as art


And now...the rest of the photos....

Saturday, August 10, 2013

Wow....that fundoshi is see-through...


 Featuring the elusive hunter green cheesecloth that has yet only been alluded to and shown slyly in photos without private body parts attached to it, the discussion starts about the sheerness of fabric. 

fundoshifundoshi art

Personally, I like the first layer to have a bit of a ‘reveal’...a sort of ‘peak-a-boo, I almost see you’ aspect for a viewer. I then like the second, or ‘apron’ layer to completely shroud and hide those most precious items. I think this makes putting on and taking off the fundoshi a bit more playful. This cheesecloth sort of pushes the boundaries of that. 


single layer

double layer


I think the absolute ‘see-throughness’ of the fabric actually informed the photoshoot (as you’ll see). 

Since the material is on the darker side, I did my first shoot with the white backdrop. This backdrop is much less forgiving due to the fact there wasn’t enough space between myself and the backdrop. If I had more space, it would have been less in focus and the wrinkles and drape would be less obvious. 

Instead of just going lighter, the discharge action for this fabric caused it to go a dark yellow, which looks really good with the dark green. When you are dealing with removing dye from fabric, you never really know what you may encounter until you try. 

Fundoshi....
Hunter Green - original and enhanced. These are 14 inches wide. For my preferences, I wouldn’t go narrow with cheesecloth. When it is roped and manipulated, it compresses more than other fabrics.
                                                       

Fabric....
Cheesecloth. It’s not that easy to find in colors, so when I do, I pick it up. 

Photography....
The white backdrop presents all sorts of challenges I will have to figure out how to deal with. 

And now...the rest of the photos....

Monday, August 5, 2013

There’s a lot of putting on and taking off fundoshi around here....


For the next few blogs, you will see various states of putting on and taking off the fundoshi. Basically, it is how I progressed through the photo shoots, one after another. Today, we have the original and and enhanced lavender crinkle gauze. 


The enhanced version here was done in 2 passes. The first one created the horizontal stripes. After setting this into the fabric, I did a quick soak of the entire fundoshi in a bleach solution to lighten it, but not turn it completely white. This is where the pink color comes from. It is all in the timing.

I tend to use either a 1:3 or 1:5 bleach to water ratio for my discharge solution. It just depends on how quickly I feel comfortable in working. When working with bleach, it is important to completely remove it from the fabric. Rinsing in water will stop the discharge action, but bleach will actually stay in the fabric, causing it to disintegrate. We don’t want stray holes in our fundoshi, do we?
  fundoshi art      fundoshi
If you search for home methods of neutralizing the bleach, you may come across sites that suggest you use vinegar. DO NOT. This produces chlorine gas which attacks mucous membranes (eyes, throat, lungs) and can kill. At craft sites, acceptable chemicals are sold, but tend to be a little expensive. The same chemicals can be found at your local home supply center that has a section devoted to swimming pools. You can purchase a dechlorinate like sodium sulfite. It only takes about 2 teaspoons per 2-3 gallons for an effective solution to remove the chlorine from the fabric, so it is very cost-effective. 
fundoshi art
fundoshi


The process is simple:
1. Perform the discharge. For this blog’s enhanced fundoshi, I simply used a brush to ‘paint’ the bleach solution onto the fabric as the first step. I then soaked it for about 20 seconds in the solution to change the lavender to pink.
2. Rinse with water.
3. Soak for 10-30 minutes in the dechlorinate solution. 
4. Wash in a normal manner.

Fundoshi....
Lavender: original and enhanced.  Don’t worry, we get to a completely new color next blog.

Fabric....
Crinkle gauze. Notice how some of the crinkle is gone in the enhanced fundoshi. The bleach and dechlorination relaxes the fabric a little.  

Photography....
Still working with new lights and backdrop. For the posing shots, I did used a low flash from the camera to capture the fabric a little better. For the 'fundoshi as art' shots, I used lower light with long exposure times. You can tell the difference a light source makes on the color changes between the 2 shoots. The 'reality' is that the posed shots are more color correct. The other shots look better with the enhanced saturation caused by the long exposure and a different light temperature. 

And now...the rest of the photos....